I thought I would show some of the process that I use to make my Parallam furniture. I recently built a Convergence table- my parallam coffee table and took some pictures of the steps along the way.
Parallam is an engineered wood beam made by weyerhauser. They are constructed out of many thin strands of veneer in order to create a massive beam far bigger than the trees used to create it could have yielded. The environmental benefits of parallam are simple: You can get bigger pieces of wood out of smaller trees, and the yield from these trees is much greater than conventional processes. Trees are round and lumber is square- this produces a lot of waste. The veneers used in parallam are rotary cut, utilizing the tree in the round. Rotary cutting is best compared to unrolling a roll of paper towel. Thin wood (veneer) is sheared off in a continuous sheet and the trunk gets ever smaller. After the veneer is cut, a post is left over- they sell this as well. In fact when I queried weyerhauser they reported 95% yield from the trees they are processing- quite outstanding.
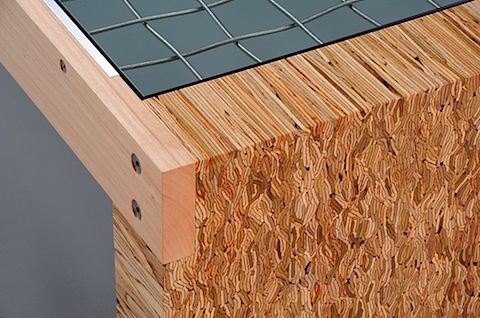
Parallam is intended to be used in Architectural structural application where exposed beams are seen. In my opinion it is pretty cool, but the best part is hidden away. The end grain of a parallam beam is a wild scramble of woods. I set out to build furniture that exposed the end grain and highlighted its amazing grain.
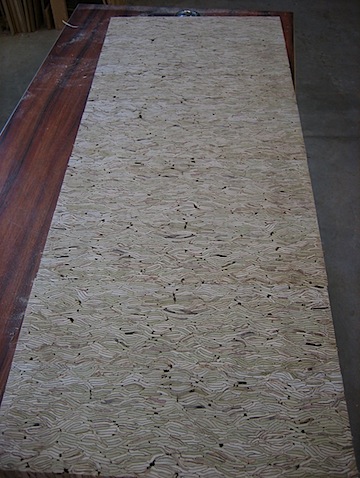
Parallam end grain
The beams I am using are made from three woods, Poplar, Spruce, and Southern Yellow Pine. All are fast growing domestic woods which have traditionally had limited appeal in high end furniture. Here is my redux.
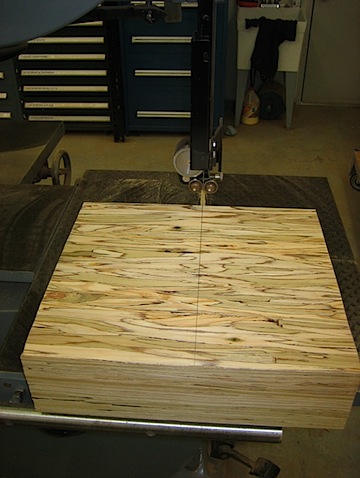
The beams I buy are 18′ Long. This one has been cut in half. It is about to cut again. It is a lot of beam, but what I am after is more of that little patch of end grain.
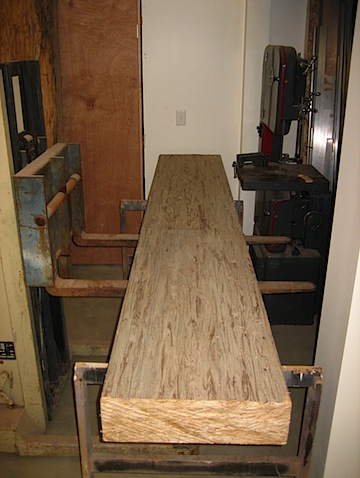
I use my 30″ tannewitz bandsaw to cut the beam into smaller, more manageable chunks.
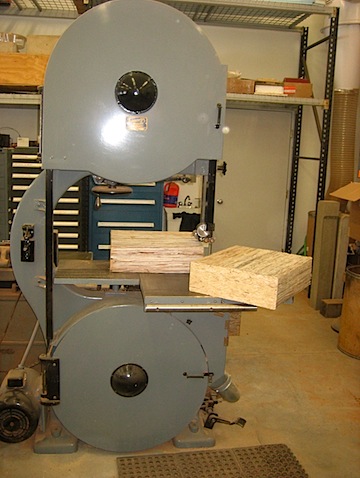
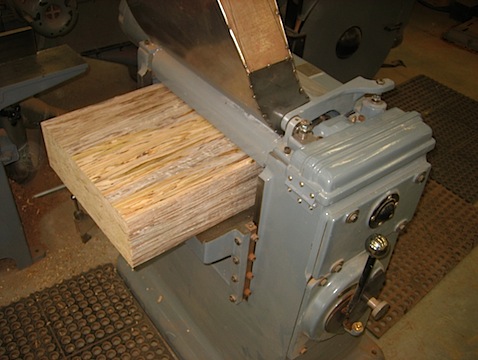
Over the 20″ wide Oliver jointer. this puts a perfectly flat face on the chunk
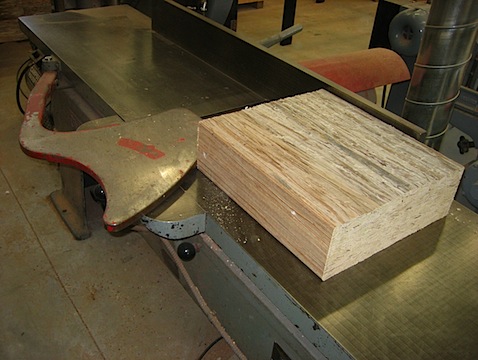
… and through the 18″ wide Oliver planer. This puts a parallel face to the jointed face.
The beams already start to reveal their inner beauty.
Next stop is back to the jointer. Now I am establishing a perpendicular edge
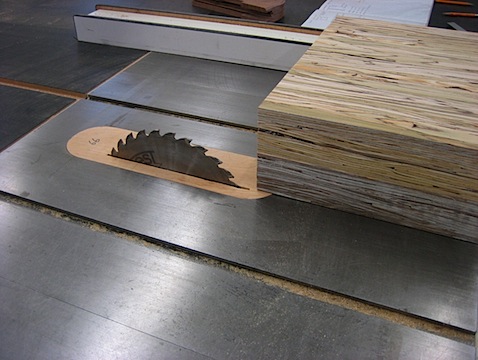
next is the tablesaw. The 5″ thick board is too thick for my saw, so I cut twice. In this shot, the board has been flipped and I am making the second cut.
I am back at my bandsaw cutting the chunk down again. here I am making a very straight cut which I can reference against the tablesaw fence
And back to the tablesaw using the cut twice adage.
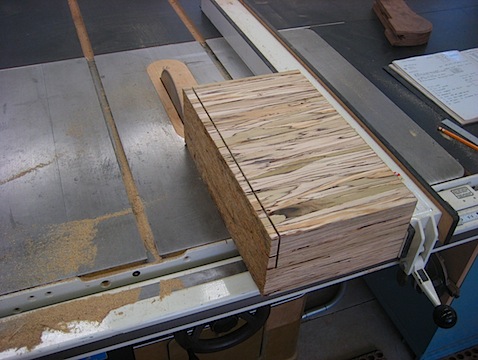
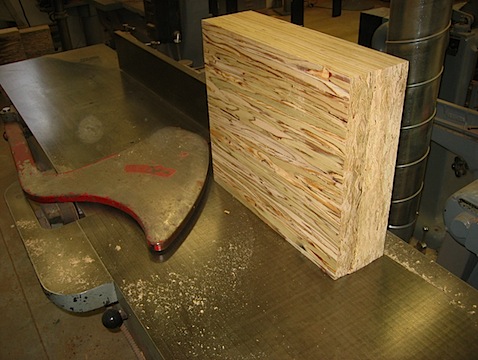
After a bunch of cuts, I finally have some of that end grain showing
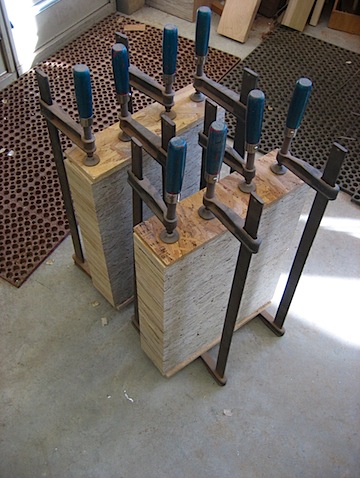
I glue the chunks back together to start to re-establish the width I just lost.
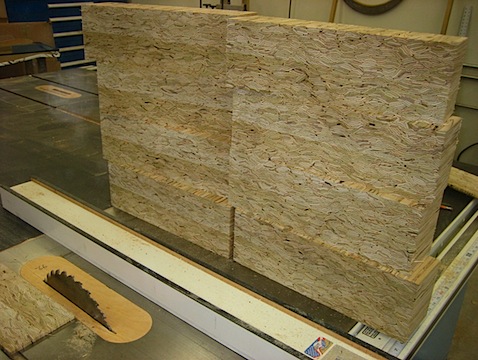
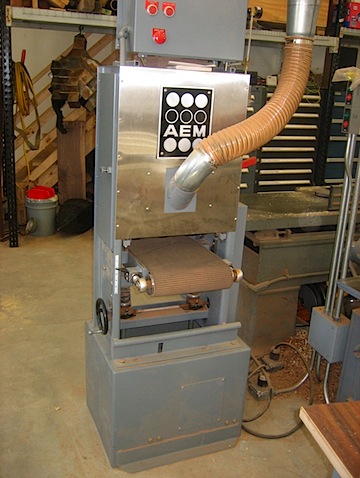
My next step is running through My widebelt sander- It is actually one of the narrowest wide belt sanders on the market. it is a 12″ wide made by AEM. I added the stainless steel covers when I rebuilt the machine.
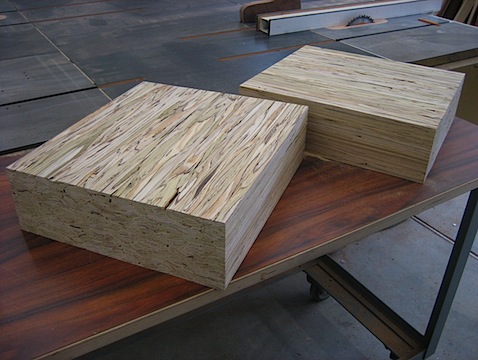
The sanded blocks now make up quite an expanse
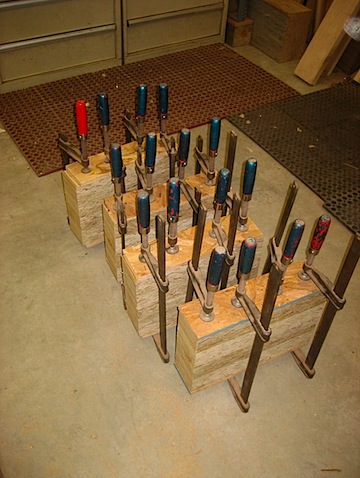
They are glued together again
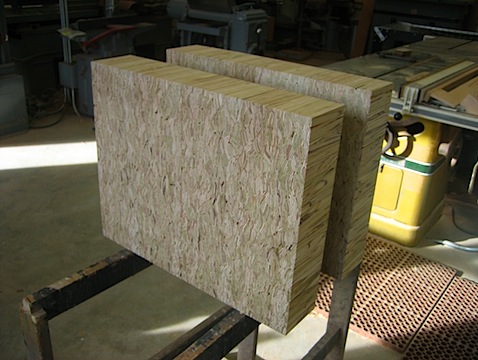
Once glued up, I square the blocks up on my hammond glider saw. These saws were originally used in the printing industry to cut lead letterpress type.
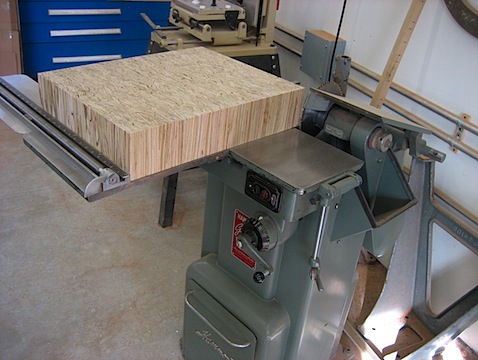
Two blocks ready to be made into a table
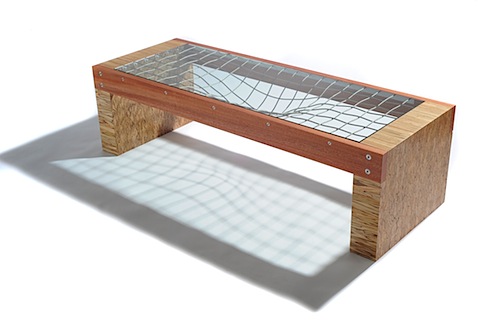
And when all is said and done The Convergence coffee table with Parallam Legs
Hi:
I was wondering what sort of glue you used for stacking together those chunks of Parallam. Thanks,
sjb
Hi SJB, thanks for the comment. I have used both yellow and polyurethane glue for Parallam with excellent results.
Peter
Hi Pete,
The coffee table looks great.
I recently built a bench out of Parrallam and am unsure how to finish it. Any tips?
I’d like a nice thick finish on it to avoid slivers.
Hi Ryan,
Thanks for the comment. To me finishing parallam is a two step process. Step one is all about the preparation. It must be sanded well and loose pieces removed. I’ll often take a sharp chisel and ease edges that might in the future become splintery.
I am not a fan on thick finishes. I find they look like too much like plastic. I prefer a two part conversion varnish that is sprayed in a professional finishing room. I have found it to be the best balance between durability and beauty.
Good luck!
Peter
Excellant work, Peter!! I’ve always wanted to make a dining room table out of Parallam and I’ve gotten a lot of good pointers from your work.
Are you selling any of your work??
Hi Nick,
Thanks for the praise. I have enjoyed creating my Parallam Furniture. All of my pieces are for sale direct from my studio. I hand make limited-production modern furniture. Each year I also make a number of unique pieces based on customers needs. These one of a kind commissions allow me to create the perfect piece for any home!
Hi Pete,
I was thinking of making a board room table from Parallam, but am concerned about the ultimate weight of such a piece. It needs to approx 4′ w.x 12′ long.
Any thoughts on methodology?
Thanks
Hi Dave,
A Conference table that is 4′ wide and 12′ long out of any material is going to be heavy. Parallam as a material is pretty similar to medium density wood. It’s limitation is the lack of strength in thinner dimensions. My advice would be to build it and not worry too much about weight. A parallam conference table of that size is not going to be moved about very often, so I would design based on aesthetic and figure out a way to deliver it.